|
So we've all tried to model a car before, and we've all looked
at tons of tutorials on doing so. Well I never quite found one
that struck my fancy, so I thought it was about time I make one.
I've put together everything I've learned to make a starter car.
In this tutorial we will be modeling the Audi Allroad Quattro
from the Blueprints Tutorial. So why not sit back, fire up modeler,
and have a go at the Allroad.
First thing I would like you to know is that I'm a poly by poly
car modeler, so I will be modeling one usually 1-5 squares at
a time. The second thing I would like you to know is that I am
only going to hold your hand until the front of the car is done.
I feel that once the front of the car is done, you all will have
the ambition to set out on the rest for yourself. Always remember
the saying practice makes perfect will forever be true.
We'll be using the Move tool (t :case sensitve), the Extend tool
(e :case sensitive) Select Point (ctrl+g), and Select Polygon(ctrl+h)
On the image below you will see that I ALWAYS start with a single
polygon right at the start of the hood. (I mean the start being,
where the front window or windscreen stops)
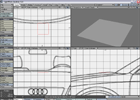
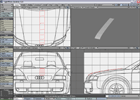
Following this I align my polygon to the contour of the hood then
start a row of polygons by using the extender tool (e :Key case
sensitive, and we'll use this ALOT) on the forward most points
to create the top length of the hood. Remember that a hood usually
isn't square and will need a bit of tweaking, just look at the
following image and you'll see what I mean.
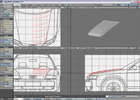
The next thing I do is select the left most points and use the
(e) tool again. Extending these points across the hood 3-4 and
aligning them with the contour like shown below.
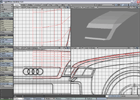
I continue to shape the hood out until I have the overall shape
done. Which if you look at the image below you'll see my results.
Again using the (e) tool, extend the points to the front far left
of the hood (next to the headlights.) Down around the countour
of the front audi grill. Shown in the image.
After this point I select the FAR left points of the hood, copy
and then paste them into a new layer. Then select all the points
in a row and hit the (p key: case sensitive) to create a polygon.
Like shown below. Following this I will extend (e) these points
out to make the top of the fender, shown in the second image below.
Now these points will have more than the polygons needed so delete
the unwanted polys selected in yell and keep the wanted ones.
Now the wanted ones in mine are flipped over so if this occurs
in yours just hit the (f key: case sensitive) to flip them correctly.
All this is shown in the image.
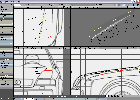
The image below shows what the above steps should look like after
all is complete!
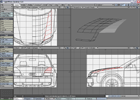
After the last steps have been completed you'll want to take the
two top left points of the fender and extend (e) them out to match
the image below. These two points will be used to extend the polys
above the doors across the automobile.
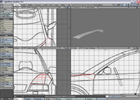
The next step will be to select the remaining points on the left
to extend (e) them out as the image below shows.
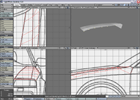
Now we'll want to line these point up to match the blueprints
of the car. You'll see in the image below that mine are matched
up nicely, so follow that as a guide. Then with the point closest
the front door, you'll want to weld (Ctrl + w) them together.
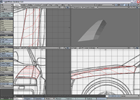
The next thing we are going to do is extend the points downward
right next do the door, so follow the images closely and try to
pay close attention to what your doing as well. so tutorials can
become a thing of the past. Again look at the image to see what
I've done.
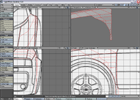
Remember in the last image there is a lot of point tweaking that
you'll want to do. So play around with where the points are and
look at images of the actual car. That helps a lot.
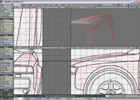
The next step will be to pull out the front of the fender to create
the rest of the fender. Follow the image and you'll do all right.
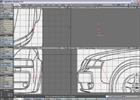
After this we are in the position to start the bumper...so select
the points shown in the image below and copy the paste them into
a new layer. After pasting them into the new layer select them
in order from left to right or right to left then click the (p
:case sensitive) key to make polygon.

After creating you're polygon use the extend (e) tool to extend
the points out as shown in the image below. Once your points are
extended delete the unwanted polygons that you got in the last
step.

Now we'll continue with the extending (e) of the bumper around
the front, remembering to watch carefully at the contour of the
actual vehicle bumper. Image below shows a bit of progress due
to the fact that I feel that you've learned enough so far to modify
the points yourself. I will not be showing such baby steps. Once
again refer to the image for any help you may need in positioning
the points.
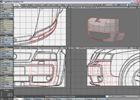
As you can see in the image below the next step is to take the
front bumper a bit further out and mesh the contour with your
model. Again refer to the image for ideas on what you're going
for.
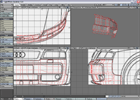
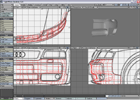
And last bit on the bumper is now finished up. The image below
again shows the rest of the progress. You'll want to pay close
attention to the real vehicle for indentation in the bumper. Underneath
the image is another image of the mesh smoothed out so you can
see what the indents look like on mine.
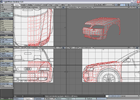
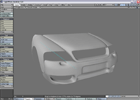
And finally below is an image of the wireframe shade view of the
front of the car, and then the front end that we just made, mirrored
and smoothed to show what the final will look like.
I hope you enjoyed this tutorial and if you have any questions
feel free to e-mail me at the contact link above.
|

